
It’s a common belief that updates are supposed to improve the performance of a software by addressing any bugs that might exist
as well as rolling out new features. However, updates don’t necessarily fix things. Sometimes, things might not go as intended, especially if the software is complicated or targets a wide variety of hardware. This article intends to teach how to fix the Wi-Fi connection issue, which affects many users once they’ve installed the Anniversary Update of Windows 10.
Solutions
Solution 1: Install The Driver (Use Hardware ID)
According to Microsoft, the main culprit is the driver of the Wi-Fi adapter. It might not function properly if it isn’t compatible with the newer update of Windows, and thus updating the Wi-Fi adapter to a newer one might help in addressing the problem. Use the following guide to find the hardware, and the driver relevant to it.
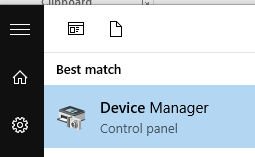
- Click the start button and then search for Device Manager. Open it from the Search Results.
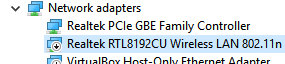
Opening up the Device Manager - Locate the Network adapters category and click it.
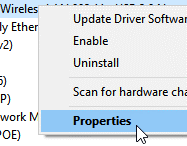
- Locate the Wi-Fi adapter and select Properties from its context menu.
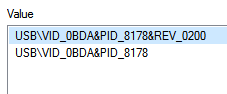
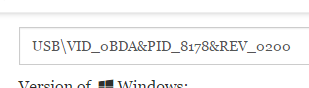
- Switch to the Details tab. Select Hardware Ids from the drop-down box in the Property category.

Selecting Hardware Ids - Right-click on the first value and copy it.
- Visit the following website where the hardware IDs can be used to search for the relevant driver: https://devid.drp.su/
- Paste the copied Hardware ID in the search box and search for it (as seen in the following screenshot).

- Select Windows 10 as the operating system as well as the architecture (x64 or x86). The Operating system’s architecture can be checked from Control Panel\All Control Panel Items\System


- Now the available driver will appear right below the filters. Click on Download to download and install it.

Click Download to initiate the downloading and subsequent installation


Solution 2: Update Windows
Windows is designed to be updated automatically since the days of Windows XP, and Windows 10 is no exception. However, if automatic update is turned off, manual updating is necessary. Let’s see how to do so.
- Click on the start button and search for Check for updates. Click to open it.
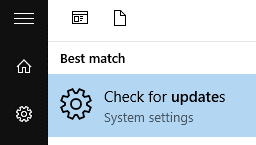
- In the next window, locate the Download button and click it.

Downloading Windows Updates


Solution 3: Modify the Power Plan
Windows 10 is optimized not only for desktop but also for low powered laptops where the power usage management is critical. To preserve power, Windows automatically turns on/off certain features/background services when they aren’t required. However, if the hardware is old, turning it off in the midst of an operation can affect its functionality. Use the following guide to set the Wi-Fi adapter as enabled at all times.
- Right-click on the desktop, locate Display settings and open them.

Opening up Display settings - Scroll down, locate Power & sleep and open it.

- Find Additional power settings and click on it.

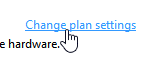
- Now look for Change plan settings and click it.
- Locate Change advanced power settings and open it.

- In the next window that opens, locate Wireless Adapter Settings. Collapse it as well as it’s subcategory Power Saving Mode to arrive at the Settings drop-down menu. Now select Maximum Performance to enable the Wi-Fi turned on at all times.
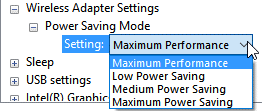
Selecting Maximum Performance


Solution 4: Turn on WLAN Autoconfig
WLANSVC service comes under the WLAN AutoConfig title provides connecting, configuring and disconnecting functionalities for the Wi-Fi adapter to work as it’s intended to. If the service isn’t enabled, the Wi-Fi adapter in the system may not work. Use the following guide to enable it.
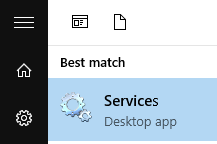
- Open the start menu and search for Services. Now click to open it.
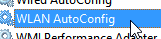
- Scroll down the list and locate WLAN AutoConfig.
- Right-click on it and select Properties.

Selecting Properties - Select Automatic from the Startup type drop-down menu.

Choosing the Automatic option - Restart the system so that the changes can be applied properly.


