
Choppy frame rates and lags are a common occurrence as far as weaker graphics cards go on games like Overwatch. Some
programming bottlenecks, along with hardware deficiencies affect the game’s performance adversely.
Check System Requirements
You need a certain set of hardware in order to get the best possible gaming experience, these requirements vary from game to game. Make sure your computer meets these essential system requirements.
- RAM: 4 GB
- Processor: Intel Core i3 / AMD Phenom
- Graphics Card: Intel HD / Nvidia GTX / Radeon HD
- Display Resolution: 1024*768
You can also check out our guide about the best gaming laptops.
Change Process Priority
Changing the game’s processing priority can have a highly positive impact on Overwatch’s performance. Allocating higher priority to Overwatch, a highly CPU-intensive game can help matters greatly.
- Press Windows Key + X; select Task Manager.
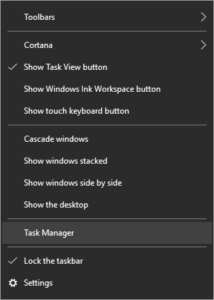
Opening up the Task Manager - Click More details.

- Right-click the Overwatch process; select Set priority | High.
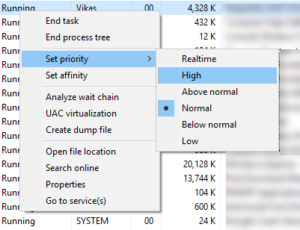
According High Priority to Overwatch Process - Exit the Task Manager window.


Lower the Game Configs
Improve frames per second with crispy low settings. Tweak the game settings with minimal appearance features.
Turn off the following feature:
- Dynamic Reflections
Lower the following features:
- Local Fog Detail
- Shadow Detail
- Lighting Quality
Optimize Services
When your computer boots up, a set of services run automatically. These services, consisting of Microsoft as well as Non-Microsoft items, consume a higher percentage of the CPU. Stop excessive memory usage by quitting the services you deem unnecessary. To do so follow the steps given here or download RegInOut System Utilities. It contains a GAME BOOST feature which allows you to turn off unwanted services with a single click.
- Type Services.msc in the Search Box on the Taskbar.
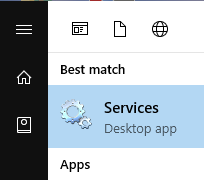
- Open the Services tool.
- Stop all unnecessary services as follows. (Right-click > Stop)
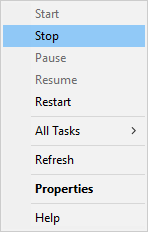
Stopping unnecessary service(s)


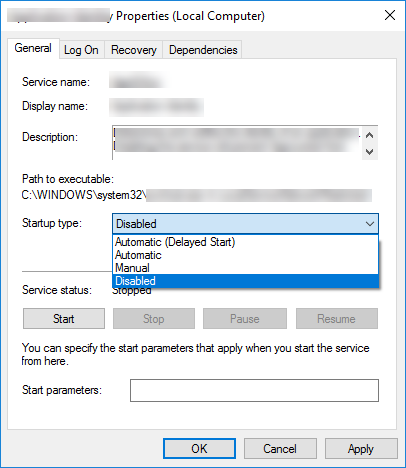
To disable a service from running at the Windows boot interval, follow the steps given below:
- Right-click a service you intend to stop.
- Choose Properties.
- Click the General tab.
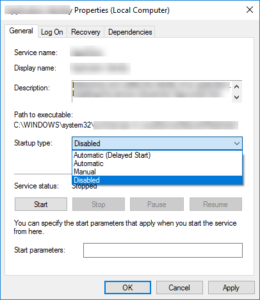
- Set the Startup type as Disabled.
- Click OK.