
Google Chrome is easily the most popular web browser nowadays. The reason is largely attributed to its high performance, security, availability of many extensions etc. One of these technologies is Flash which is primarily used by developers while designing browser-based games.
This article intends to discuss the freezing issue in such games. An easy yet automatic way to boost Google Chrome speed and fix Flash games freezing is to use the ST Cleaner. ST Cleaner comes with powerful cleaning tools. I
Optimize Flash Games in Chrome
ST Cleaner is secured software. Never bundles with any other application
Solutions
Solution 1: Update the Chrome
The first step that needs to be taken in an eventuality is to update Chrome because the developers might have already fixed the issue in a newer update. These steps explain how you can update Google Chrome easily and safely.
- Open Google Chrome from the start menu.
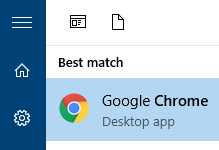
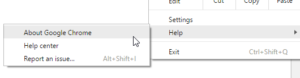
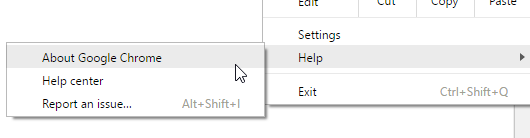
- Click on the three vertical dotted button to open the menu.

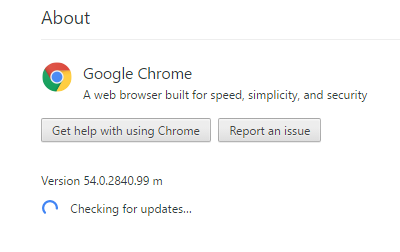
Opening up Chrome’s menu - Move the cursor a bit down until you locate Help. Once you’ve located it, move the pointer over it and then click About Google Chrome from the menu that opens.
- Now Google Chrome will scan for and install all available updates.
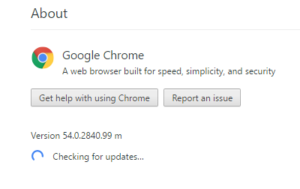
Chrome update in progress - Once the update is over, restart Chrome.
Solution 2: Install The Latest Graphics Driver
Generally speaking, Adobe Flash Player makes use of the graphics card to render its contents instead of the CPU for performance enhancement. Thus having an up-to-date Graphics Driver is important for getting the optimal result out of it. However, if the Graphics Card is really old, then this trick might not work for you, but there is no harm in trying it out nevertheless.
For Nvidia
- Visit the following website:
http://www.nvidia.com/Download/index.aspx?lang=en-us - Click on GRAPHICS DRIVERS to initiate the download.

- Once the downloaded is over, patiently wait for the computer to be scanned and then download the relevant Graphics Driver.
For AMD
- Visit the following website:
http://support.amd.com/en-us/download - Click on the DOWNLOAD NOW button to initiate the download.

- Once the download is over, allow the tool to scan the computer and download the relevant Graphics Driver once you’re prompted to do so.

For Intel
- Visit the following website:
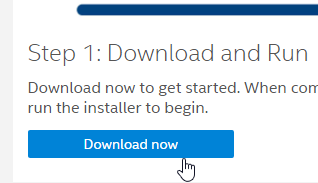
https://downloadcenter.intel.com - Click on Get started, followed by Download now to initiate the download.


- Once the downloaded is done, allow the tool to scan the computer and obtain the relevant Graphics Driver. Unlike AMD and Nvidia, Intel doesn’t manufacture its own Graphics Cards, but graphics chips are instead embedded either with motherboards or Intel processors.

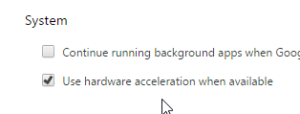
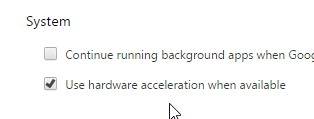
Solution 3: Enable The Hardware Accelerator
Even though the hardware accelerator doesn’t directly improve Flash’s performance, the performance issues that persist in Chrome might affect the multimedia application that uses Flash. Turning on the Hardware Accelerator transfers some of the workload to the Graphics Card. As the Graphics Card is way too faster than the CPU when it comes to parallel processing, the performance will be significantly improved across all applications that run within Chrome, including Flash.
- Launch Google Chrome.
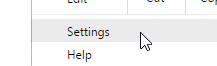
- Click on the three vertical dotted button to launch the menu.
Opening up Chrome’s main menu - Now select Settings.
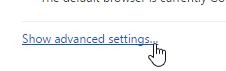
Click on Settings - Scroll down and locate Show advanced settings. Click it to expand the hidden settings within it.
- Once again move the cursor to the bottom of the screen, locate the Use hardware acceleration when available checkbox and select it.
- Restart Chrome for the changes to take effect.
Solution 4: Close All Unnecessary Programs/Tabs/Startup Programs
Chrome is known as a memory hog as its architecture facilitates improving the browsing performance. However, if the system doesn’t goes above the minimum amount of system memory, Chrome will start behaving in an abnormal fashion just like any other app would do. So the system needs to have at least 4GB memory, even though 8GB is highly recommended. However, even if the system has a lot of memory, it might not work as expected if it’s infested with unnecessary applications which run in the background. Use the following guide to turn them off for freeing up more resources back to the system. An improvement in system performance will soothe out any issues in Chrome, which will in turn positively impact any Flash applications that run within it.
A. Close All Unnecessary Programs
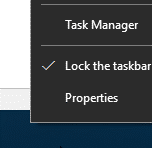
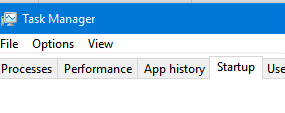
- Right-click on the taskbar and locate Task Manager. Open it.
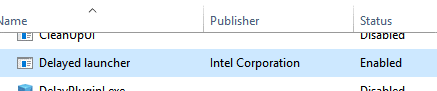
Opening the Task Manager - Now locate the Startup tab and click it.
- Within the Startup tab, find all unnecessary programs and terminate them by right-clicking every program and selecting Disable from the context menu.


B. Close All the Unnecessary/Unused Tabs in Chrome
If a whole lot of tabs are opened simultaneously in Chrome, this can drastically slow down your browsing experience. Close all the unused tabs in order to free up memory for Chrome as well as the Flash application.
![]()
- Locate all unnecessary tabs and click every single tab to switch to it.

- One by one, click the cross (X) button to close the tab.

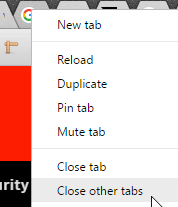
- If you wish to shut down all the tabs except the current one which you’re using, right-click this active tab and select Close other tabs. And all the other tabs will be closed instantly.
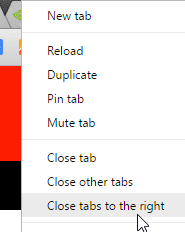
Closing all tabs except the active one - If there are multiple tabs that you do not wish to close, move all of them to the left side. Now open the last tab (moving to the right side of the important tabs) which you wish to retain. Right-click it and select Close tabs to the right. This operation will close all the tabs located to the right side of the currently active tab.
Closing all tabs to the right