
Your computer’s disk space is the logical storage space that is used to store documents, photos, videos, music and all other kinds of files. When your Windows 11 runs out of storage space, a notification pop-up will appear that your storage is full and needs to be cleaned.
Your computer will run slower and you may encounter frequent freezes and crashes. Some programs may not work at all, especially graphic-extensive and multimedia applications.
Method 1: Using Storage Sense
Storage Sense is a native feature in Windows that shows up how much portion of your storage is occupied and by which file types. Using this feature, you can get back your storage space.
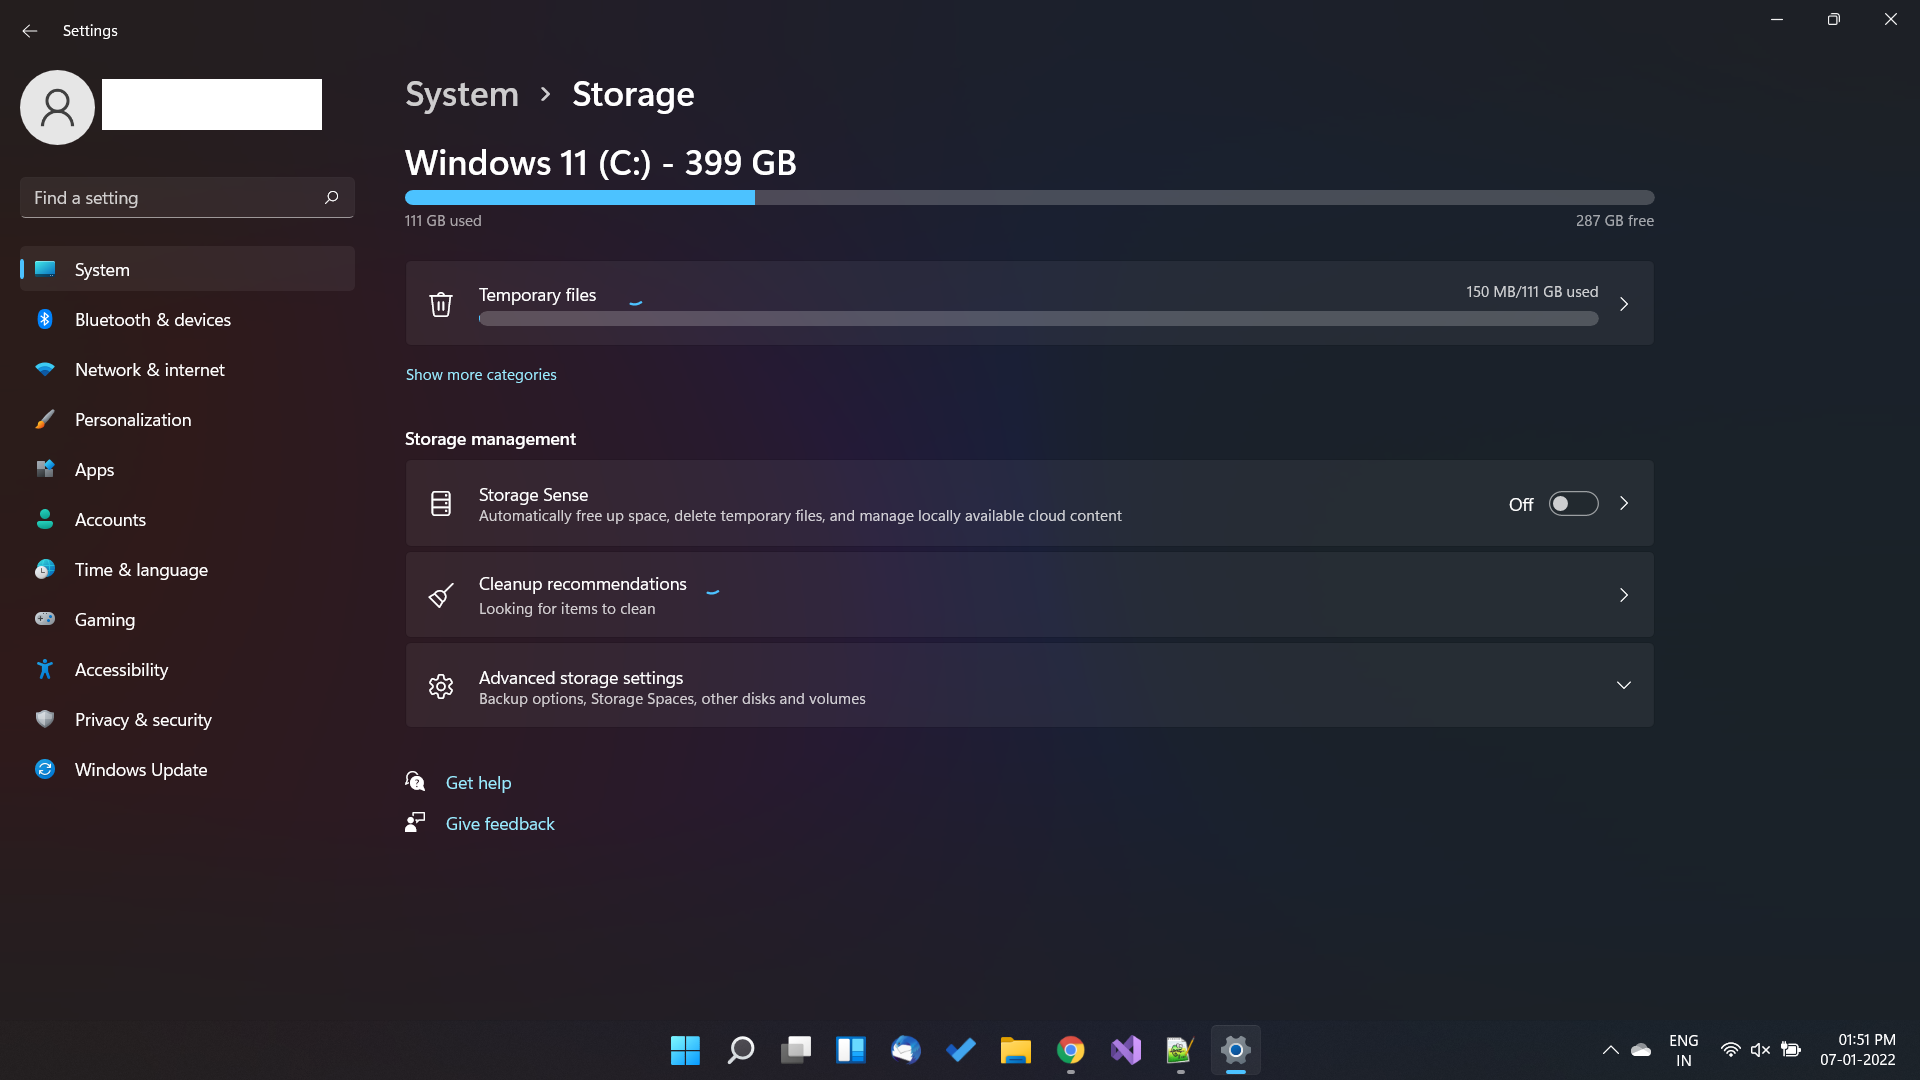
- Click on Start > Settings.
- Click on System > Storage > Enable Storage Sense, if already disabled.
- Wait for some time and Windows will analyze and show up which components are taking how much of your storage. For example: System & Reserved, Apps & Features, Temporary Files, Documents, Downloads, Recycle Bin, Thumbnails, etc.
- Select the categories you want to clean and then click on Remove Files.
- Also, select the checkbox labelled Keep Windows running smoothly by automatically cleaning up temporary system and app files.
Optional:
In the Run storage sense drop-down box, choose an interval (for example, every day, every week, every month, during low free disk space). By default, the last option is selected as your computer cleans up storage every time it runs low on storage. We recommend changing this to Every month.
Method 2: Delete Duplicate Files
Duplicate files are identical copies of the original files on your PC. Your computer may accumulate duplicate files as you download or transfer the same files repeatedly. Sometimes, duplicates are also caused due to third-party software.
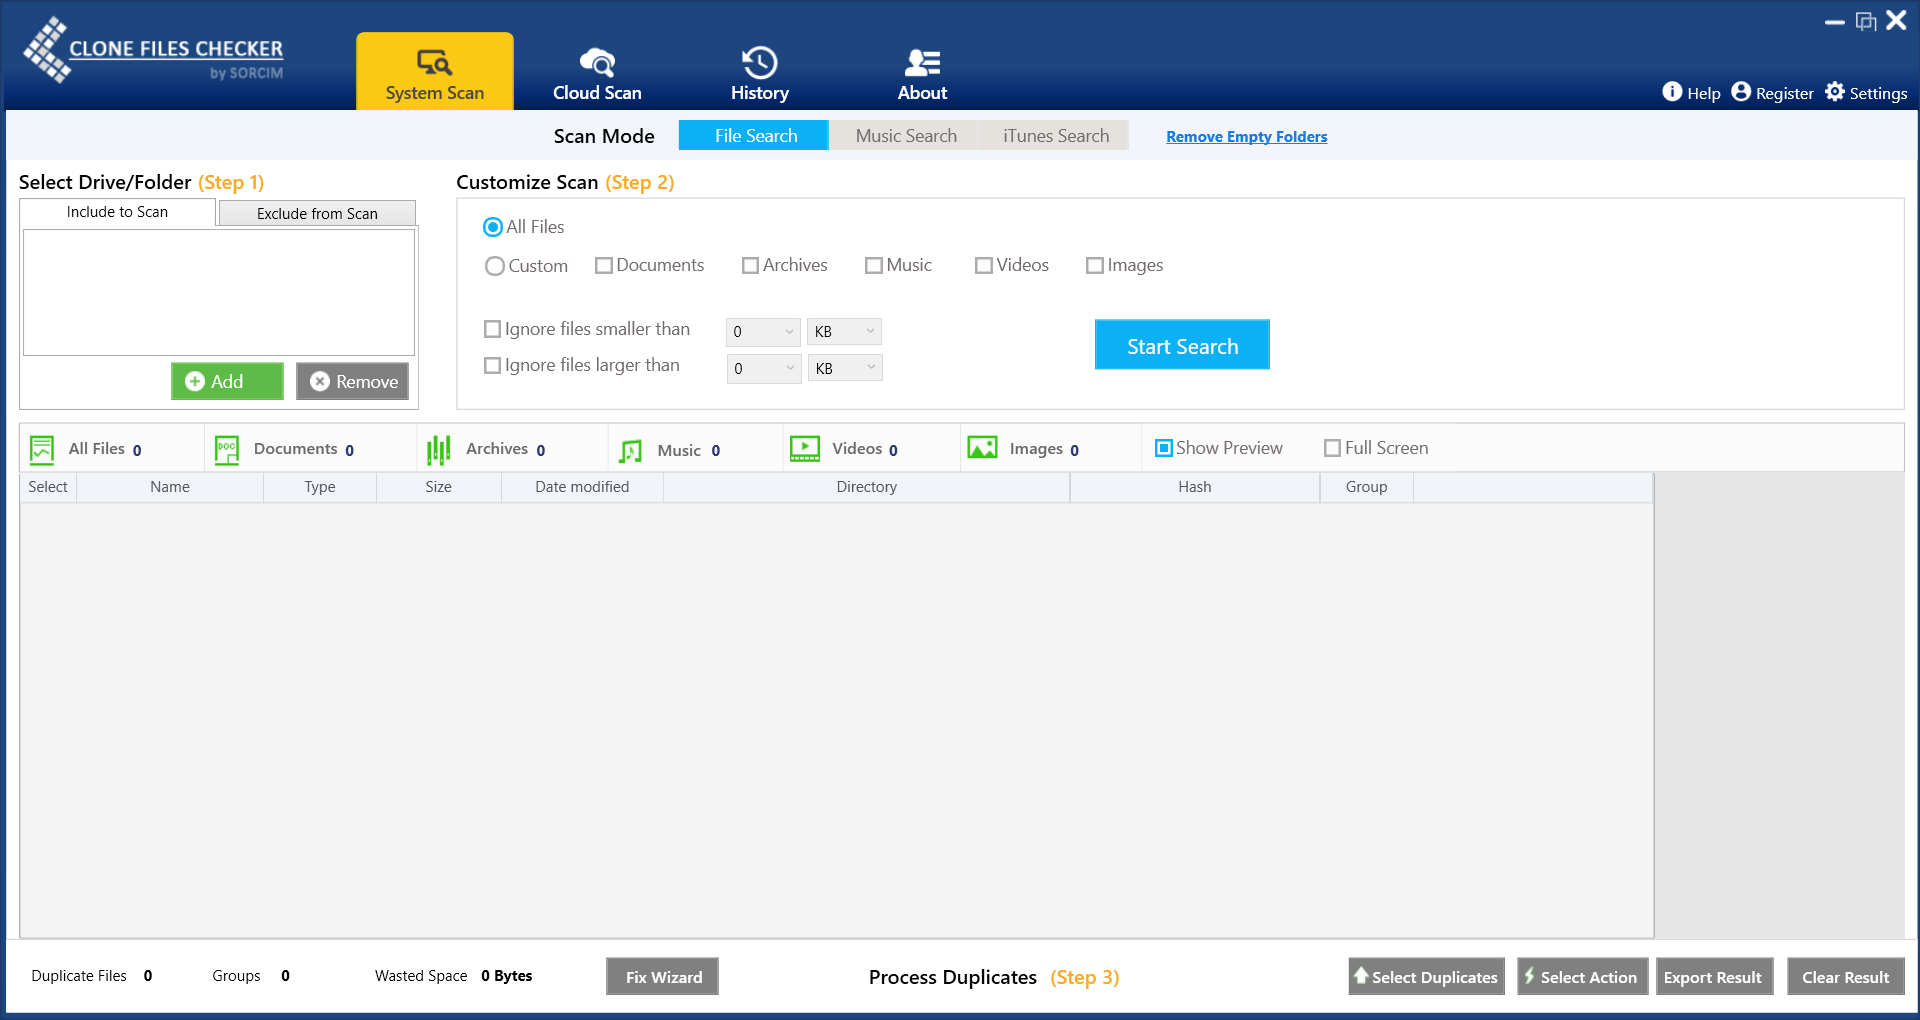
- Download Clone Files Checker and install it.
- Click on Add and select the folder you want to scan for duplicates.
- Now, set up the scan filters. For example, you can decide whether you want to scan a certain sized files or all files. You can specify the limits in KB, MB or GB.
- Similarly, you can set up file type settings that allow you to choose which file types to scan. For example: Documents, Images, Music, Videos, Archives. You can also modify this list from the program settings, if required.
- Click the Start Search button to launch the scan and wait for some time.
- Once the scan is finished, click Revew & Fix in the scan results pop-up.
- Mark the files you want delete or move. Use the checkboxes or just click on the Select Duplicates button and choose a criterion of your choice (for example, newest files in each group, oldest files in each group, most modified files in each group, least modified files in each group).
- Click on Select Action > Delete Permanently or Move to folder.
Benefits:
- Clone Files Checker uses the industry-standard file hashing algorithms to detect duplicates. This process is 100% accurate.
- No files are deleted/ moved without your consent. You can mark or unmark files before proceeding.
- The app also provides a wizard-based interface to quickly fix duplicates without needing to review them.
- In-house file previewing functionality helps you preview the file content without needing to externally open each file.
- iTunes Scan: Using this feature, you can find duplicate iTunes music files.
Method 3: Using Disk Cleanup
Disk Cleanup is a Windows storage cleanup tool that can help you free-up GBs of storage occupied by different Windows components, programs, Internet applications such as Web browsers and email programs.
- Open File Explorer.
- Right-click on a partition you want to clean.
- Select Properties.
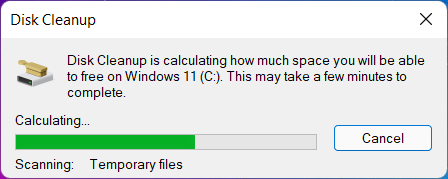
- Click on Disk CleanUp.
- In the new dialog box, select all the items unless you want to delete only specific file types.
- Click on OK.
Method 4: Uninstall Programs
You may also want to uninstall any programs you no longer use. You can also find other alternatives to programs that take a considerable disk space.
- Click on Start.
- Select Settings.
- Click on Apps > Apps & Features.
- Click on the three dots next to a program you want to remove.
- Select Uninstall.
- Follow the uninstaller wizard.
Method 5: Delete Large Documents & Personal Files
Another way to free-up storage is to delete large-sized files. Using File Explorer, you can sort your files by their sizes and then delete large files to get back your storage.
- Open File Explorer.
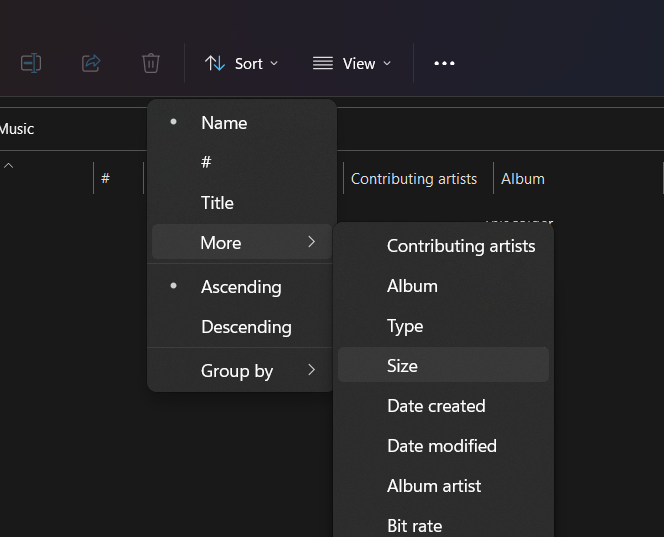
- Click on the Sort icon.
- Select More > Size.
- Your files will be sorted from large to small size.
- Select multiple files at once by pressing the Ctrl or Shift key of your keyboard and choosing them with your mouse cursor.
- Now you can easily delete the files you want and recover storage space.