
An error message appears while installing software in Windows 10. It is pretty simple to diagnose the issue.
The Windows Installer service could not be accessed.
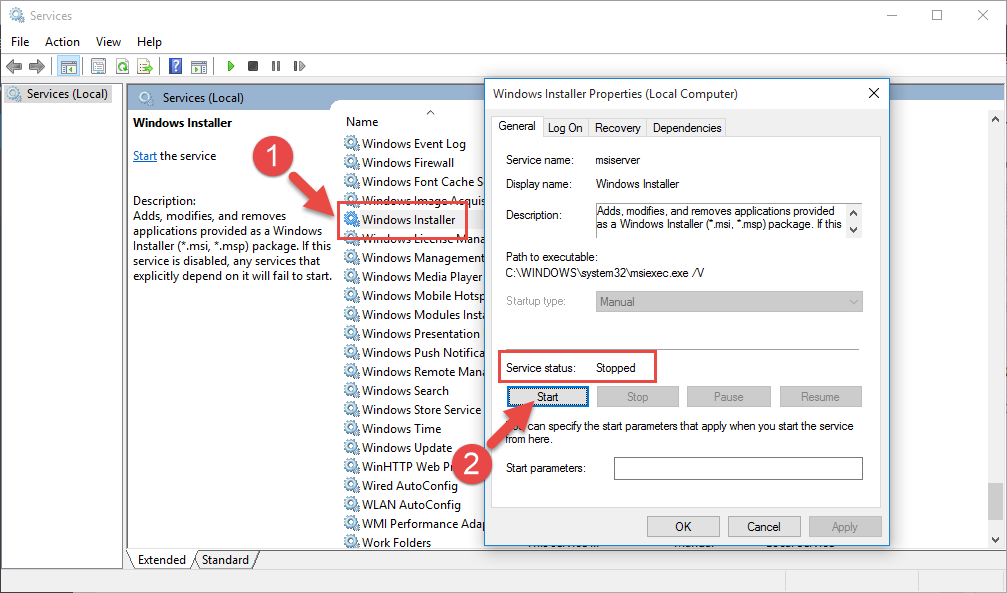
Restart the Service
Using Services tool in Windows 10, load list of all services, scroll down and restart the Windows Installer service. The service may not be running at the movement or it has been stopped abruptly.
Set Startup Type to Automatic
If restarting the service didn’t work, change the startup type to automatic using the Properties dialog. The service may have been stopped from executing at boot time interval. A system reboot is required.
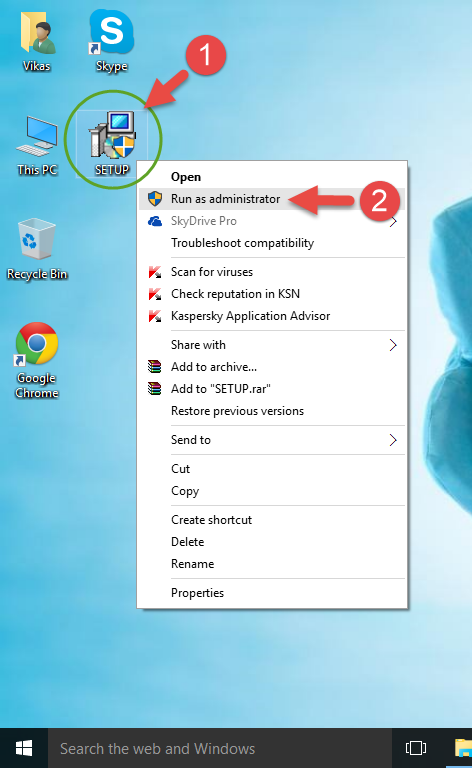
Run Setup with Administrative Privileges
Exit and re-run the setup program with administrative privileges. To ensure installer has access to your files and Registry, open Folder Properties dialog of your installation directory and make sure read/ write privileges are granted. Besides, exit and rerun the setup as administrator.
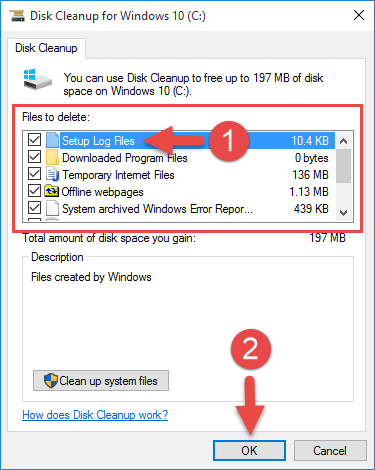
Clean Temporary Directory
Before initiating the setup operations, first, clean out the temporary directory. Right click system drive, open Properties dialog > Disk Clean-Up tool and clean up as much as files as you can.
Determine Image Path
Using Windows Search feature make a note of the location of MSIEXEC.EXE file located in system drive. The default location is: C:\Windows\System32. In the “ImagePath” string in HKEY_LOCAL_MACHINE\SYSTEM\CurrentControlSet\Services\MSIServer; set the correct location.
Reinstall Windows Installer
Uninstall Windows Installer, remove specified files using Command Prompt and download a fresh setup online A system reboot is required in order to save the changes. Here are the paths you need to delete:
- cd %windir%\system32
- ren msi.dll msi.old
- ren msiexec.exe msiexec.backup
- ren msihnd.dll msihnd.backup
- EXIT