
Windows OS sometimes encounters errors, to the dismay of Microsoft. As it is a complex software that is designed to perform a huge range of tasks at any given moment, it is quite understandable for few bugs and errors to hit it often.
Even though they are usually fixed through Windows update center from time to time, still it’s hard to fix all the issues. This is the reason why any operating system has a long support time period and after that, it’s replaced by a new operating system. Talking of errors and bugs, some of them are caused by users or third party applications as well, specifically applications which heavily depend on Windows Kernel or drivers which interact with the hardware through the operating system. This article covers this particular error known as System File Error. Even though it primarily targets Windows 10 operating system, these methods should work for other operating systems as well, although the steps may vary.
Perform Indepth System Cleaning to reduce errors
ST Cleaner follows Google Software Principles
Symptoms
- An error message may appear on the screen with one of these error codes.
-1073741819 -1058340861-1073545193-1073741521This may appear either randomly or when an application is launched. If it occurs in the latter case, the error message will show the application’s name and the path where it’s installed along with the error and the error code. - The system may or may not be work as per routine but the operating system and the applications may have certain abnormal issues in their functionality which didn’t use to occur previously.
- The system may face the BSOD (Blue Screen of Death) frequently.
- Certain applications may not start at all.
- This error is quite frequent when a user upgrades from Windows 7/8/8.1 to 10.
Solutions
Solution 1: Reset the Operating System (General Solution)
The most easiest and quickest way to fix such file system errors is to simply reset the OS. This proves very helpful especially when the user is absolutely clueless on how to tackle such errors.
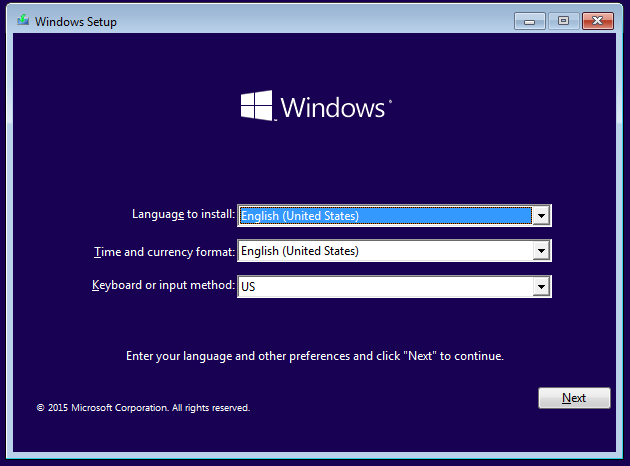
- Find a bootable Windows 10 DVD or USB stick, insert it in the DVD ROM or USB port (as applicable) and then reboot it. When the following message appears on the screen, simply click Next to proceed to the next phase.
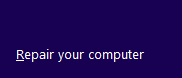
- Click Repair your computer.
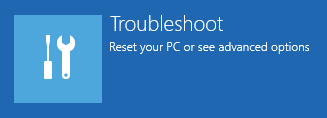
- Click on Troubleshoot.
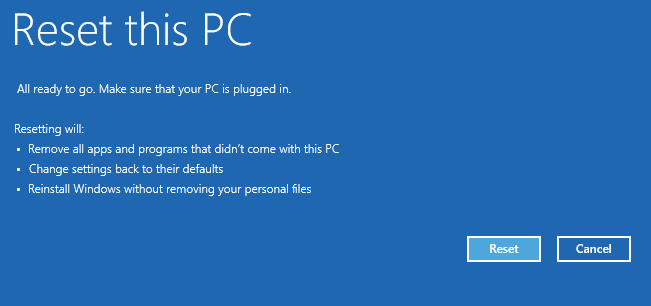
- As you’re out to actually reset the Windows installed on your computer, you will select Reset this PC in this step.
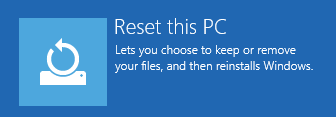
- Click on either Keep my files or Discard all. The first option means the user will retain all of their files from My Documents, Videos, Music etc, whereas the latter option will simply lead to a complete cleanup.
- Click on Windows 10 as the target operating system.

- Click on Reset at the end.


Solution 2: Repair the System Files (General Solution)
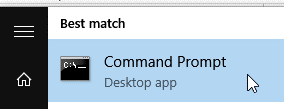
- Open the start menu.
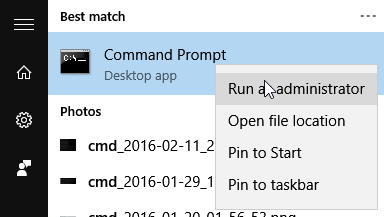
- Search for Command Prompt.
- Open it in Admin Mode by right-clicking it and then selecting Run as administrator.
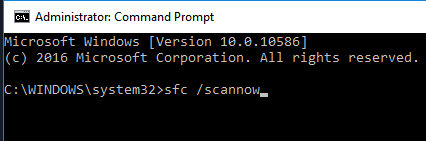
- Type this command in Command Prompt and then press Enter:


- sfc /scannow
Solution 3: Repair Component Store with Deployment Imaging and Servicing Management (DISM) (General Solution)
When SFC cannot repair the system files, it means the Windows Component Store itself is damaged. Windows Component Store is basically used to repair any damaged system files and therefore repairing it with DISM tool is inevitable in this scenario. Follow these instructions to repair it.
- Click on the start button.
- Search for Command Prompt.
- While launching it, choose Run as administrator.
- Type out these commands in Command Prompt and press Enter to execute them:
DISM.exe /Online /Cleanup-image /Scanhealth.
DISM.exe /Online /Cleanup-image /Restorehealth
- Now follow the steps mentioned in Solution # 2 again for even better results.
Solution 4: Update Windows (General Solution)
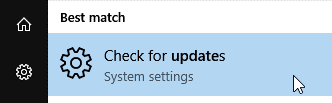
- Click on the start button to open the start menu.
- Search for any updates.
- Click on Check for updates from the search result to launch the update wizard.
Solution 5: Clearing the Windows Store Cache
After updating to Windows 10, when windows store or any metro app is being launched, this error message may appear on the screen without letting the user to proceed.
- Open start menu.
- Search for Command Prompt. Now right-click on the search result and select Run as administrator.
- Type the following command and press Enter to execute it. This command is basically designed to clear Windows Store Cache.
- wsreset.exe
Solution 6: Reinstalling All the Windows Apps (Just For 1073545193 Error)
If Windows store apps don’t work properly, you can either reset Windows or repair the store apps. However, repairing the store apps is the best method as it can be performed much quicker than resetting Windows. This step is also worth trying if the apps are important and the user can’t afford to remove them. There is an inbuilt method too but the following tool will reduce the number of steps to follow.
- Change the following folder’s ownership to admin-level:
C:\Program Files\WindowsApps - Download TakeOwnershipEX from the following site:
https://winaero.com/download.php?view.16 - Install it and run it as admin.
- Click on Take Ownership and then select C:\Program Files\WindowsApps. This will take the ownership of the aforesaid folder and allow to make any changes in it in admin mode.
- Open the start menu.
- Search for PowerShell and run it in admin mode.

- Type the following command in PowerShell and press Enter to execute the command. (This will remove all the store apps from windows 10, but no need to panic as they will be reinstalled later).
Get-AppxPackage -AllUsers | Remove-AppxPackage - Now reboot the computer.
- Again run PowerShell as mentioned in step # 3.
- Now type the following command in it and execute it by pressing the Enter. (This will reinstall all the windows store apps).
Get-AppXPackage | Foreach {Add-AppxPackage -DisableDevelopmentMode -Register “$($_.InstallLocation)\AppXManifest.xml”} - Now restart the system again. This should fix all the issues related to Windows store apps.
- If any issues still persist, we recommend updating Windows to the latest version. This usually happens automatically unless the user to chooses to update manually.
