
Google Chrome has been winning over admirers ever since it’s inception.
And this trend doesn’t look like ending up anytime soon. Due to its stability and being extremely judicious on the computer’s resources, it has found favor with users belonging to diverse backgrounds, industries etc. It sometimes does run into trouble, which causes great inconvenience to the users. One such issue is the sudden unresponsive behavior of the browser. If you face such a scenario frequently, you may need to check the following solutions. Before you proceed, you can also try the automatic way to clean Chrome and system junk using the ST Cleaner software.
Optimize Google Chrome Now
ST Cleaner Download, It’s Secure and Comes with Verisign Digital Certification
Turn off Sandbox mode
Google Chrome makes use of a Sandbox mode to provide the best possible protection against malware threats. It does so by creating a single process per tab, which helps to contain the malware issues (if any) within that process. But this method can consume a lot of resources from your computer and cause the Kill Pages error to appear. You can fix this issue by turning off the sandbox mode, which will, however, reduce the security of your web browser.
In order to do that, you can add -no-sandbox as an argument when launching Chrome. Simply right-click the Chrome shortcut you use the most, and go to Properties. At the end of the Target text box, enter -no-sandbox after the closure of the double quotations.
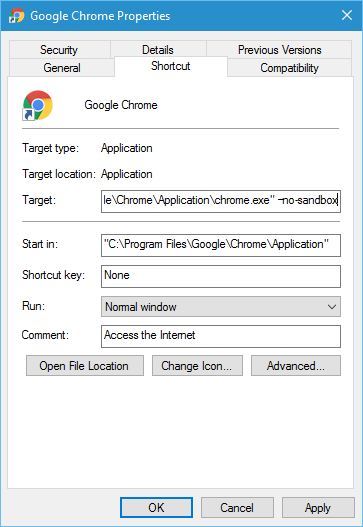
Hit Apply → OK to finalize the changes.
Disable third-party Cookies
Cookies are used to improve the browsing experience, but they can also lead to problems. You can try disabling them and check if this helps matters.
In Chrome user interface, go to chrome://settings/content. This will open up the Content settings window. Simply enable the Block third-party cookies and site data option as shown below.
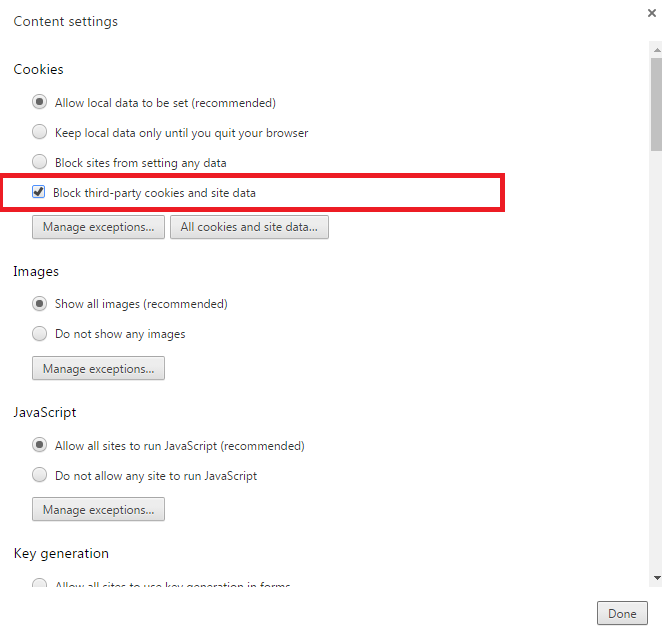
Finally, click Done to save the changes.
Delete / Rename Default AppData folder
Google Chrome is designed to store its cached sites in this app data folder. If you constantly see unresponsive pages, you should delete it at once. Here is how you do so.
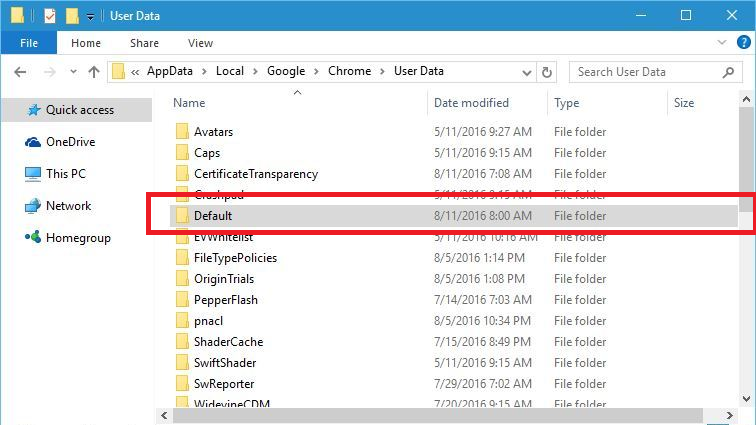
Open the Run window by pressing Windows Key + R. Now type %localappdata% and press Enter. Navigate to Google\Chrome\User Data\.
Now you will be seeing the Default folder. You can choose to either delete or rename it. Once you’ve made your choice and relaunch Chrome, it will recreate a new one in an instance.
Disable Hardware Acceleration
Many users have stated that they have fixed the unresponsive pages issue simply by disabling the feature named as hardware acceleration.
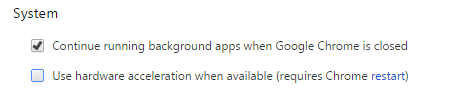
The procedure is quite straightforward. In Chrome, click on Customize and control Google Chrome icon ![]() and then select Settings. Scroll down all the way to the bottom and then click on Advanced. Scroll down once again until you locate the System section. Simply disable the Use hardware acceleration when available option.
and then select Settings. Scroll down all the way to the bottom and then click on Advanced. Scroll down once again until you locate the System section. Simply disable the Use hardware acceleration when available option.
Re-install Chrome
If none of the above mentioned solutions worked out, try re-installing Chrome.