How to Rename Groove Songs in Windows 10?
Nowadays the major component of any generic operating system is the media player which plays media content. With this in mind, Windows provides a brand new app known as Groove which plays media content and is available to the general public since the launch of Windows 8. This article intends to discuss how to rename songs in Groove with ease. If you wish to rename songs in bulk, you can use Easy File Renamer to make renaming task easier. Download it from the following link:
![]()
Solution 1: Rename The Songs Within the App
This method is of course very convenient as the function to rename the songs is within the app, however, it renames not just the song’s name, but also all the details related to the song. Thus it’s important to be careful when renaming the songs, otherwise incorrect information may give a hard time finding details of the song again.
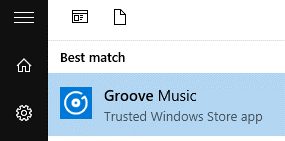
1. Open Groove through Windows Start menu.
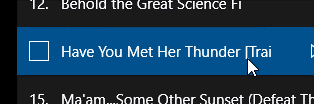
2. Find the song to rename, and click to highlight it.
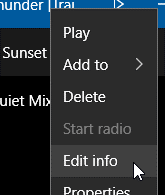
3. Right-click on the desired song, then select “Edit info” from the list.
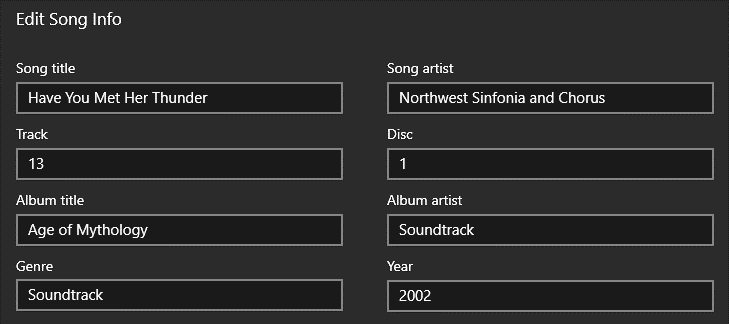
4. In the opened panel, find “Song title”, and change its title to a desired one. Note that this change is permanent, and cannot be undone.

5. It’s also possible to edit all other information, apart from the “song title”
6. To make changes in the “Advanced options” of the song’s metadata, simply turn on the option in the following screenshot.

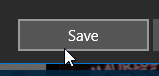
7. After making changes in the opened panel, click on the “save” button to save them into the song.
8. Check the changes on the song in real time in the playlist.

Solution 2: Rename The Songs with “File Explorer”
This method is quite straightforward and very familiar if you have ever used the “properties” window of any folder or a file by right-clicking on it. “File Explorer”, which used to be known as “Windows Explorer” automatically adds a separate tab which has unique options especially for the songs. From there the song’s metadata can be changed.
Option 1: Change Details of a Single Song
1. Navigate to the folder where the file is located

2. Select to highlight the file to rename

3. Right click on it, and then select “Properties” from the list

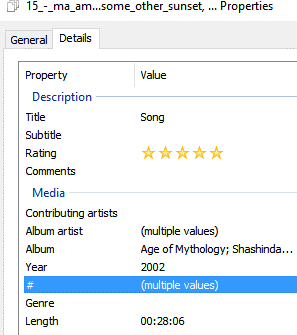
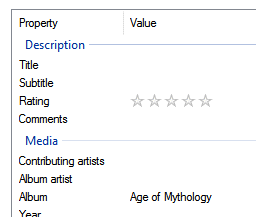
4. Switch to the “Details” tab

5. Use the following panel to change the details of the song. Make sure to click on the “Okay” button to save the changes to the file.
Option 2: Change Details of Multiple Songs.
Note that this method isn’t recommended to change unique data of a file as the changes then reflect on all the selected files. Therefore, use this method to change common details like the “Album name”, “Album artist”, “Comments”, “Year” etc.
1. Navigate to the folder where the file is located

2. Highlight all the songs to rename.

3. Right-click on one of them, and then select “Properties” from the list.

4. Switch to the “Details” tab as done in the previous section, then make changes. Make sure to click on “Okay” once it’s done.