
Windows operating system is a complex software and not at all that simple as it seems to use from the outset. Due to its complex nature, the occurrence of bugs and errors is inevitable.
Though Microsoft always ensures any bugs are fixed, sometimes they do remain unresolved for a long period of time. This article talks about how to solve this particular error – 0x80070570, which is mostly related to Windows’ file system. Cleaning your system is also important. Use this insanely easy and fast utility to clean up your computer. Download it here:
Clean Your Windows Using ST Cleaner
ST Cleaner follows strict principles of security and gives 100% control to users
Symptoms
- Windows setup doesn’t proceed ahead and rather ends up showing an Installation Error
- Certain files cannot be removed through conventional methods
- Installation Media doesn’t proceed ahead and always ends up showing the Files Missing Error
Solutions
Problem 1: Windows Setup doesn’t proceed ahead and rather ends up showing an Installation Error
Sometimes, users experience the error 0x80070570 while trying to install Windows. It basically says the required files are either missing or corrupted, therefore, the setup can’t proceed to its next phase. This might sound like an error related to the setup files, which usually come in a DVD or USB drive. However, what happens actually is Windows doesn’t install files directly from the media drive, rather it does so only after copying all the setup files to the hard drive. The culprit might be anywhere from the installation media to the system memory or even the hard drive itself. So it’s important to examine each component in detail to find out where the fault lies.
Check Windows Installation Disk /USB
Install Windows on another PC and see how it goes. If the installation is abrupted over there as well, probably the installation media is the culprit. See if you can get the disk/USB exchanged for a new one. If you’ve downloaded the setup from an online source, re-download it. Make sure to use a download manager as browser’s default download manager may corrupt the file while it’s being downloaded or while it’s being flushed to the hard drive once the download is complete.
Check the System Memory
If Windows isn’t already installed in the system, surely you can’t use its inbuilt memory checker. In such a scenario, the best option is to use a tool known as “Memtest”, which can be downloaded free of cost. And then you can easily boot the system from a USB or a hard drive to check the system memory.
- Use a computer system which is working well and has a working USB port.
- Visit memtest86 website and download it:
https://www.memtest86.com/downloads/memtest86-usb.zip - Run its main executable (ImageUSB) file in Admin Mode.
- Insert a USB pen drive, DVD or a hard drive, which has at least 100MB of free space.
Note: All the files on the USB / hard drive will be removed or replaced while bootable files are being written to it - Make sure the settings in “ImageUSB’ are set like this.
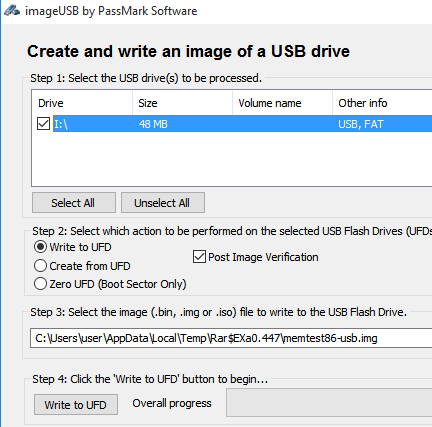
- Select the USB drive wherein the USB device is plugged.
- If everything is set as per the above screenshot, click “Write TO UFD” to commence the data writing process.
- Boot the faulty System with this bootable USB drive. (refer to your motherboard manual to find how to boot USB pen drive).
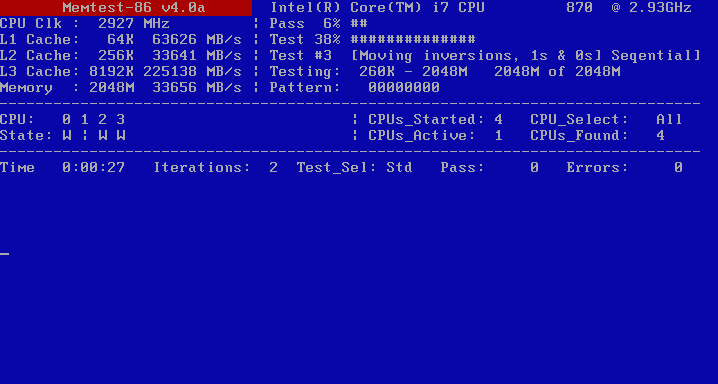
- When the memtest is booted, it will automatically start checking the System Memory. Wait for memtest to complete the checkup.

Check the Hard Drive
As mentioned above, one of the reasons for error 0x80070570 to show up is a corrupted file system or a faulty hard drive. If the HD is brand new, simply formatting it will do the trick as this process will also fix the file system errors. But if the hard drive cannot be formatted (due to any reason), connect it to another system, and scan it for file system errors through Windows’ inbuilt file system scanner.
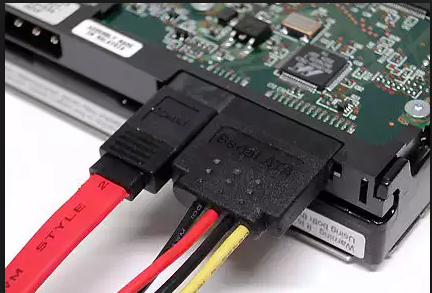
- Attach the Hard Drive to another system.
- Now turn on the computer and wait for it to completely boot up.
- Click the Start button to open the start menu.
- Click File Explorer.

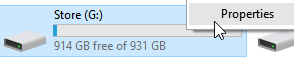
- Find the attached drive in the Windows Explorer (File Explorer) and then Right Click -> Properties.
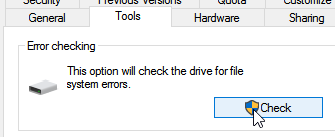
- Switch to the “Tools” tab and check for errors by clicking on the “Check” button in the Error checking section.


Problem 2: Certain Files cannot be removed through conventional methods
- Open the start menu.
- Click the “File Explorer” to open the Windows Explorer.
- Locate the attached drive in the Windows Explorer and Right Click -> Properties.
- Click on the “Tools” tab and check for any errors by clicking on the “Check” button. If the File is in the System Drive, which is usually C:\, the system has to be restarted to scan.
- Now delete that particular file.
Problem 3: Installation Media Doesn’t Proceed ahead and always ends up showing the Files Missing Error
- Download HashCheck Shell Extension from this URL:
http://code.kliu.org/hashcheck/ - Install it and then restart the system.
- Locate the installation file to be scanned.
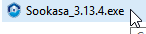
- Right Click on it -> Properties.

- Go to the Checksums tab.
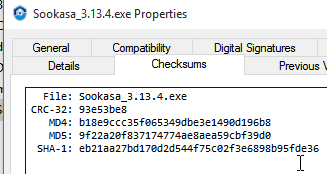
- Repeat the exact procedure as explained in Steps 1 to 5 to a copy of the same file on another system and then compare the MD5 numbers of both the files. If they match with each other, both the files are okay. However, if the MD5 codes don’t match up, either of the 2 files is corrupt while a corrupt file always has a wrong MD5 number. If there are large numbers of files involved, right click on the parent folder and repeat steps 4 and 5. It will bring up MD5 values of every single file from that folder.
